The Ultimate Erg Rower Technique Tutorial
For functional fitness and CrossFit athletes, rowing is a foundational monostructural movement in fitness programming. However, unlike complex movements like the snatch, muscle-ups, and toes-to-bar, rowing doesn’t appear as intimidating, leading many athletes to overlook optimal form. This Erg Rower technique tutorial will guide you through the key components of mastering rowing form so you can maximize efficiency and crush your next WOD!
Proper Rower Technique – Setup Position
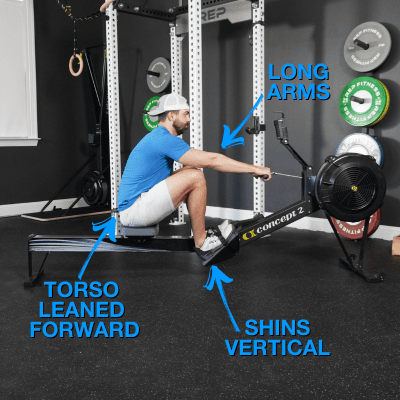
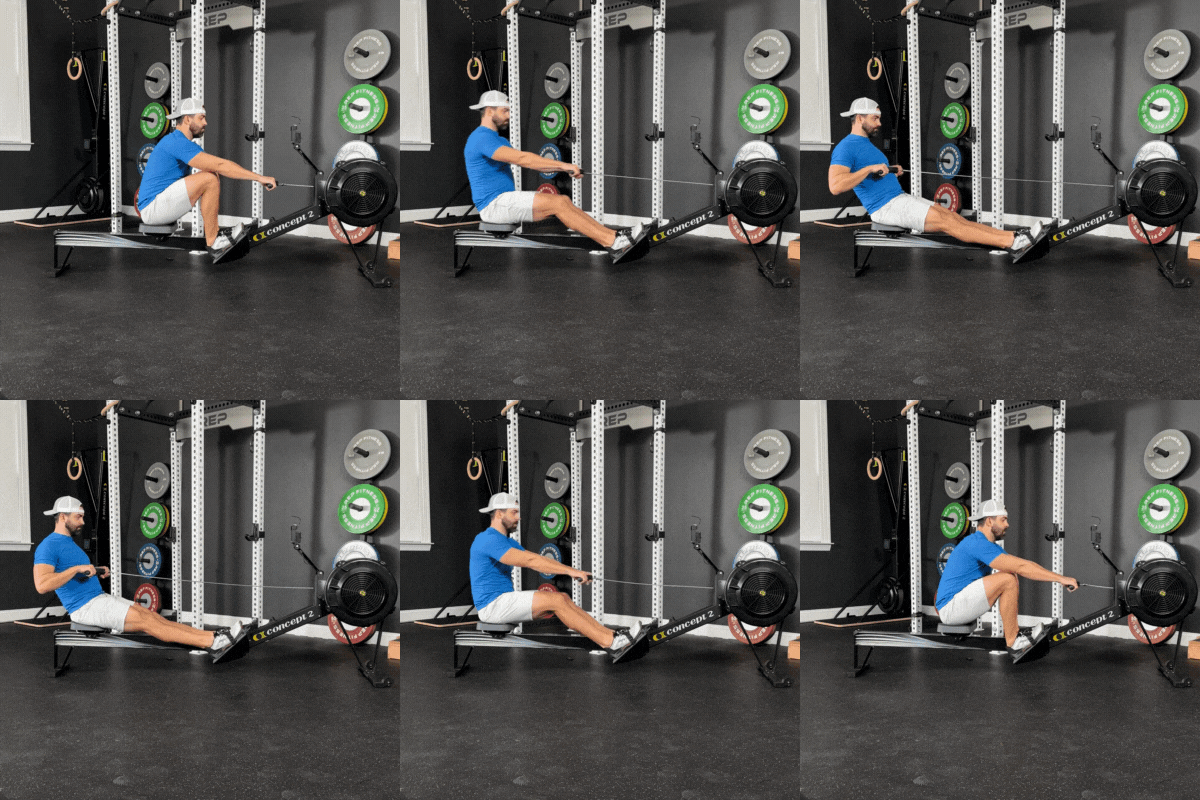
In the forward position of the row, focus on these three points:
- Vertical Shins – While some coaches emphasize keeping heels flat on the rower, I prioritize achieving vertical shins. Many athletes struggle with ankle flexibility, which makes it challenging to reach this position without lifting the heels slightly.
- Forward Trunk Lean – Aim for a 1:00 position (or 11:00, depending on your viewpoint).
- Extended Arms – Reach towards the chain’s anchor point with your arms fully extended.
Proper Rowing Form Sequence
To teach proper rowing technique, I guide athletes through three distinct drills:
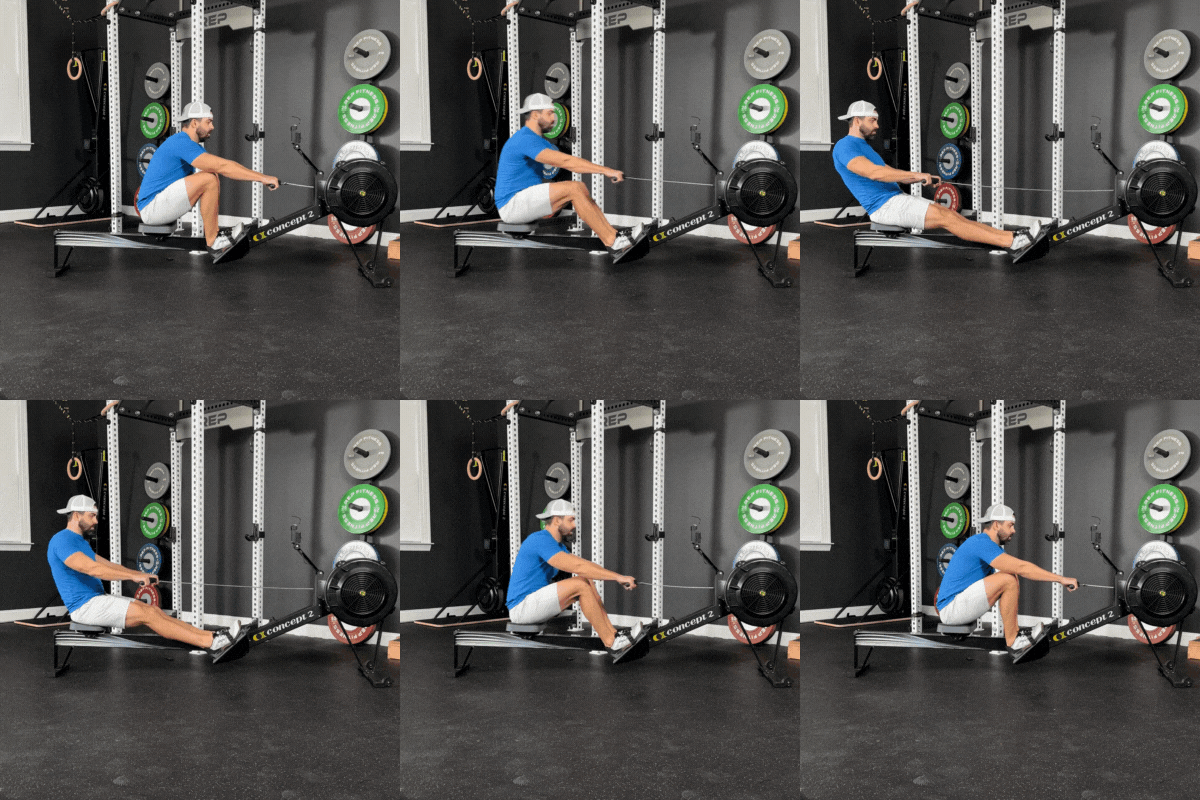
Step One: Rower Leg Drive
This is a common area where athletes struggle. Begin by pushing through your feet, keeping the trunk leaned forward as described above. As your knees extend fully, let your hips open to about the 11:00 position.
Tip: Watch the handle and seat movement during the initial portion of the leg drive. They should move at the same speed; if one moves faster, it reduces the force of each stroke.
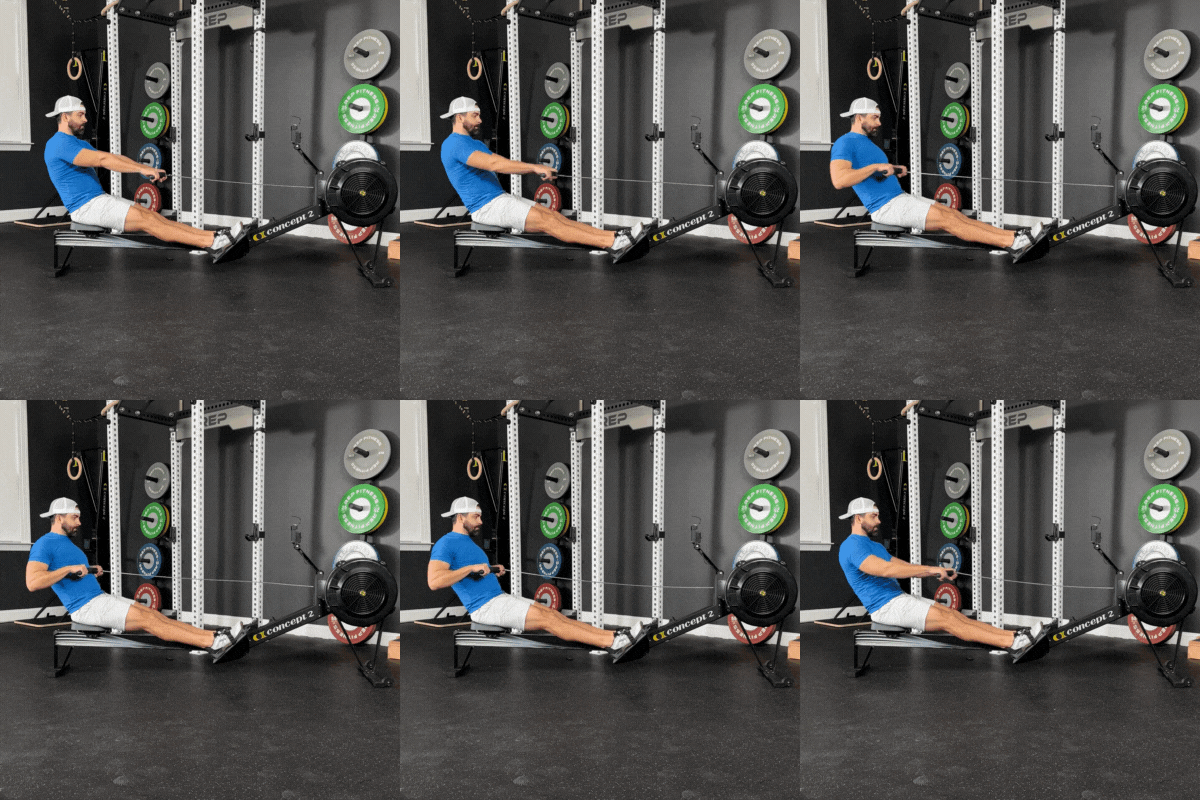
Step Two: Rower Arm Pull
Start in a leaned-back position with legs fully extended. Pull the elbows aggressively back, bringing the handle to your lower chest. Pause briefly at the chest, then extend the arms back out in front of the body.
Step Three: Combine Leg Drive and Arm Pull
Combine the first two steps. Initiate the movement with a leg drive, allow the hips to open, and pull the handle to your lower chest. Pause at the chest, then extend the arms. Once the arms reach the knees, bend your knees to return to the starting position. The pause is crucial for reinforcing that the arms initiate the return to the start.
Once you’re comfortable with these three steps, you’re ready to row with great form!
Rower Technique Self-Assessment
Here’s a quick way to determine if your row erg technique has a solid foundation. Watch your handle vs. seat speed in the initial push of each repetition. Efficient form will have these two pieces moving at about the same rate. If not, we need to work on Drill #1 above and improve our leg drive.
View this post on Instagram
Adjusting the Rower’s Drag Factor
The drag factor measures the flywheel’s rate of deceleration, impacting rowing efficiency. To optimize the drag factor on a new rower, follow these steps:
- Set the damper to 1 out of 10 and navigate to the display’s home screen.
- Select “More Options,” then “Display Drag Factor.”
- Row until a drag factor number appears on the screen.
- Adjust the damper and row again, repeating until the drag factor reads between 125-130, which is optimal for most CrossFit and functional fitness workouts.
Optimal Rowing Strokes Per Minute
Finally, let’s discuss how many strokes you should perform each minute. I tend to vary SPM based on the distance I am rowing:
- Long distance (5k+): 20-25spm
- Sprints (500m or less): 32-38spm
- Most metcons: 25-30spm
Become Unstoppable on the Rower
If you’re serious about improving your rowing performance and building lasting conditioning, check out our Rower Build Your Engine program. This six-week plan trains all three of your body’s energy systems, building an unstoppable engine for functional fitness athletes.

