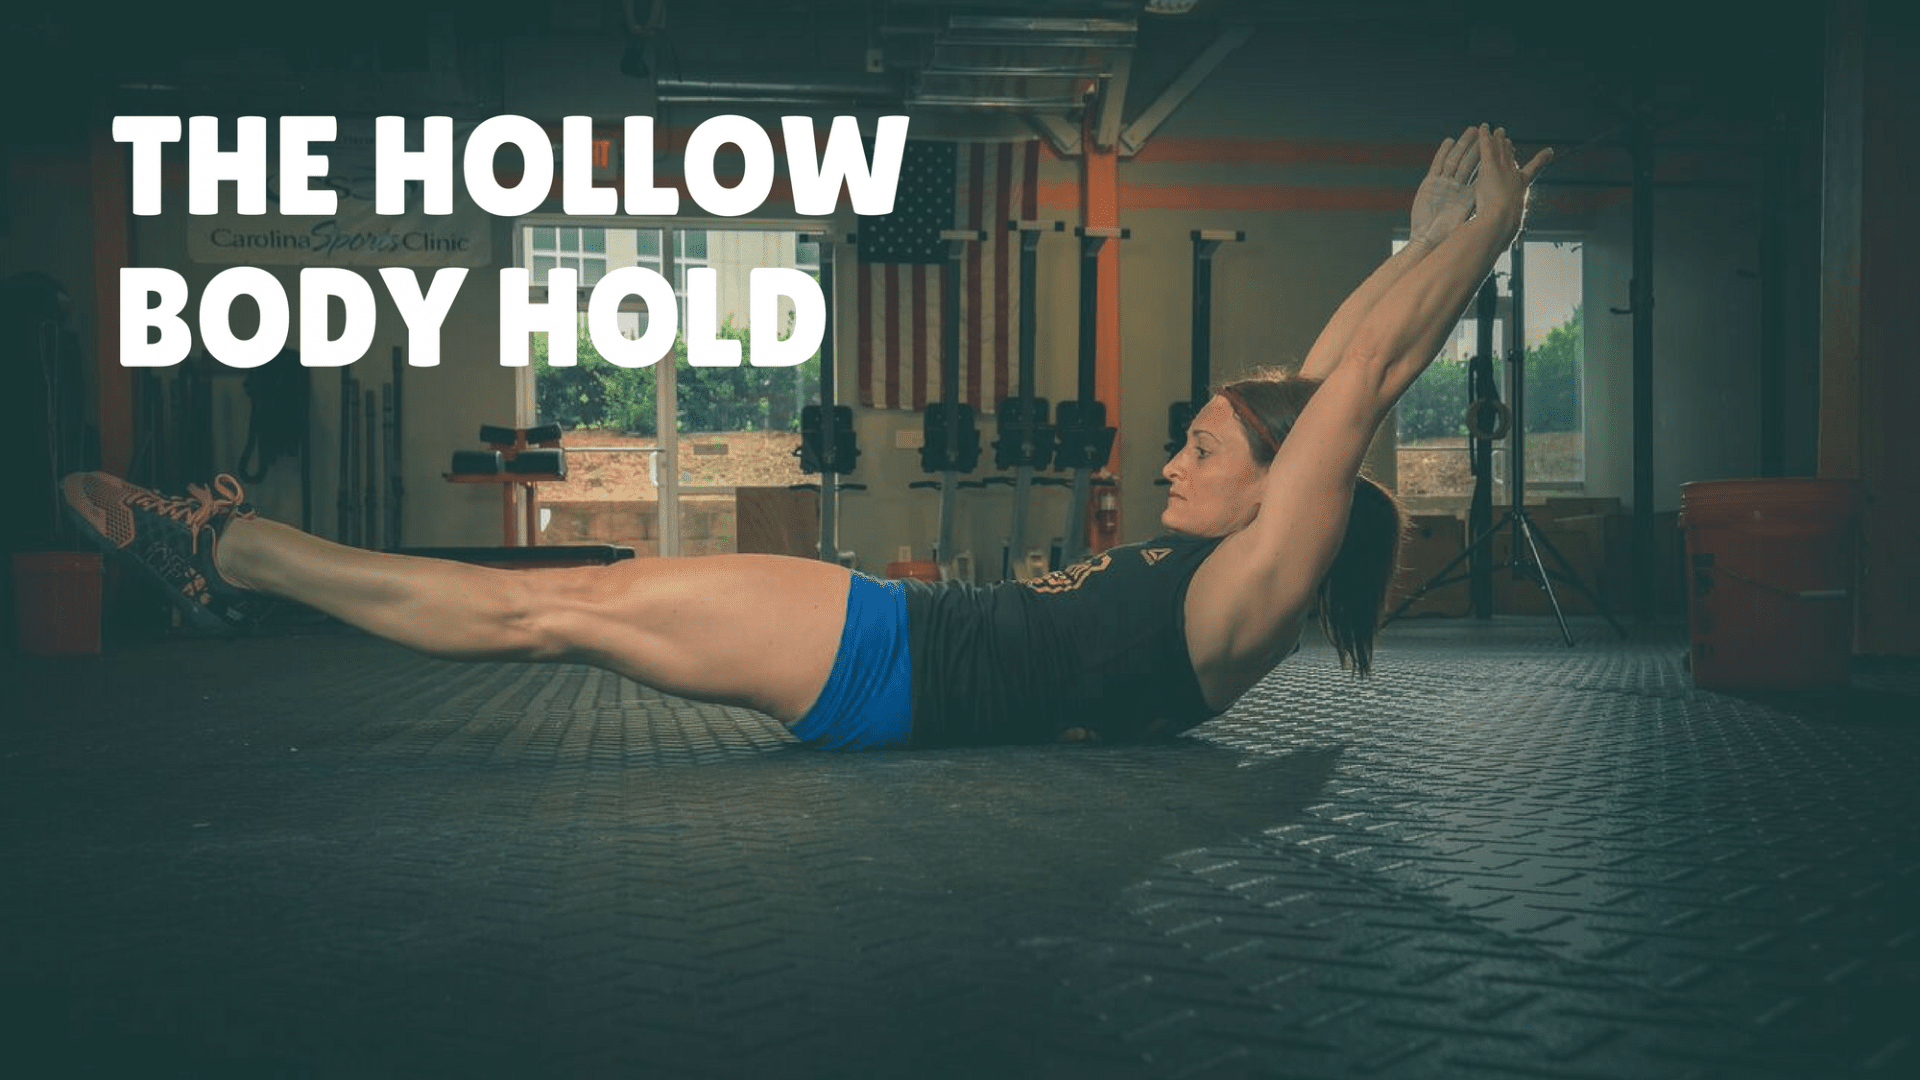
This week I’m joined by CrossFit games athlete and gymnastics & bodyweight strength specialist Pamela Gagnon. Together, we discuss the hollow body position. The hollow body is a foundational movement in gymnastics. Mastering this exercise will provide great carryover into all sports.
ARTICLE FREEBIE!!! Our Gymnasty Core WODs features several killer ab accessory workouts. Get access to that today!
KEYS TO THE HOLLOW BODY POSITION
HOLLOW BODY HOLD VIDEO TRANSCRIPT
Pamela: All right, so the first thing I’ll have the athlete do is lay down on their back and I’ll have them feel underneath their lower backs. What we want to do in the hollow position is kind of stack our entire spine with our pelvis and make it stay more stable, so we’re going to get rid of that lumbar curve by getting into this hollow position.
The Tuck Position
First thing we’re going to do is tuck and then what I want … Also, if you tuck even further in, you’ll notice the rotation of your pelvis gets even more and you’ll kind of hide that position if you were to feel under your back even more, or press down even more, so the weaker the core, the more tucked you’ll be.
Got it? Okay, so you can stay right here. You’ve got a good core. All right, so the first thing I tell them is when time is ready, we’re going to reach for our heels and we’re going to basically sew our ribs to our belly button and look through our knees.
Beautiful, so kind of slightly tucked head, but I can fit a fist under. Good. Then, you’re going to feel under your back and there’s space or no space?
Zach: No space.
The Hollow Body Position
Pamela: Right, so relax. That right now is a hollow top position. It’s the most basic. We want to make sure that we master that by holding at least 20 seconds and having that strength to be able to do that. The most common fault is looking to the ceiling. If you look to the ceiling, it opens your shoulders and your rib cage and that’s gonna basically open up the spine back into that position. Also puts a lot of stress on your neck, so we want to kind of contract into moving our shoulders and our head line and vision into more stable position.
Zach: It’s important to know with that, that we’re talking about an entire spine flexion movement where every segment is slightly flexed and the pelvis is pushed really tilted versus it being more of a pike where it’s just the hips being flexed, so it’s not a neutral spine. It is actually a flex spotting throughout the entire spine.
Posterior Tilt
Pamela: And the posterior tilt is really very hard for a lot of people to understand how to get into. So, I’ll have him stand up instead of sitting and I’ll tell them to pretend that they have a screw all the way through their hips and I want them to crank that screw under and that really helps them understand what it means. Squeezing your glutes usually fixes ninety-nine percent of the problems.
Alright, so after you are able to do that then we’re going to elongate our lever. Now, if we think -you can relax for a sec- if we think about holding groceries out here, even though it’s the same groceries if we pull it in it feels heavier out here. So the longer the lever the harder it is. So, we need more strength.
Alright, so we’re going to get back into tuck, reach, eyes through our knees, and then we’re going to bring our foot down to here. So we basically want the distance from our shoulder to our feet about the same length off the floor. Good, and relax.
As the coach, I would make sure that … checking under the back to make sure their able to hold that position. If they’re not, I say ribs closer to belly button or reach further to your heels as well too.
Pamela: Let’s talk about the leg being higher versus being lower. So, show that position with higher leg out.
So what’s happening is we’re taking out the hip flexor strength a little bit. You’re still in a hollow position from the upper body, but if we want to add that hip flexor and quad strength we lower it to make it more difficult.
Good.
So it’s not necessarily wrong, the only thing that goes wrong is if you’re opening up that spine again.
Alight, the next thing would be just meeting both legs out. So we would get one leg out and then bring the other to meet it. And hold, and reach.
Good. You’re in a really nice, I call it the banana shape. Beautiful. Because we teach gymnastics to little kids, so if it has to do with food or animals they’re all in.
So that looked really nice.
Progressing
Again as we get stronger, we can achieve going lower and lower- being able to tuck that pelvis under as well too.
So hands were in front, I can show you the final position.
So I like to get into it same way that you are, so I know can hit each point.
Now you’ll notice my feet are little bit lower than yours. Little bit more of my back is actually on the ground because of the rate you had a little higher that compensate for the rate that your feet were. And then the final position would be way out here.
Now you can go up here, it’s fine, it just makes it a little easier the further out the easier it is. And you can see it’s a difficult position to indefinitely hold.

